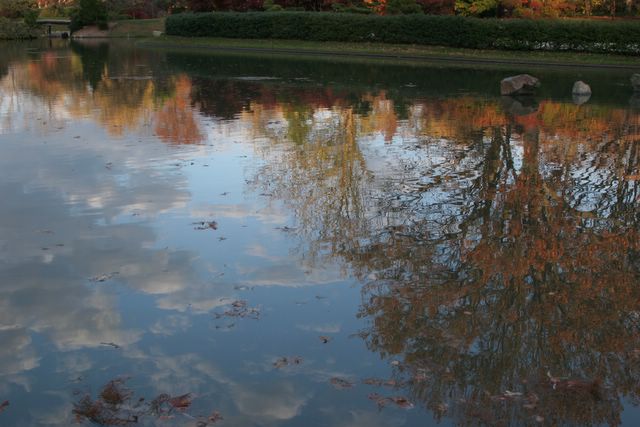
Fall Reflections 
posted by geopic | 8:32 PM
|
1 comments
![]()
As a Certified Photographic Consultant I'll share photography tips and photoshoot experiences. I'll discuss other interests (such as literature, music, and various other topics) over time.
I'm a Certified Photographic Consultant, have written a couple books, and overall enjoy life.

My daughter is in a photography class, so we get to go on photoshoots together with an assignment in mind. If you haven't been in a photography class for a while, pretend that you are and give yourself an assignment. You'd be surprised how differently you see the world with an assignment in mind. Our assignment this week was reflections and lines. A few weeks ago it was cityscapes. You get the idea. I can't share my daughter's black and white film prints here, but I can share some that I took.
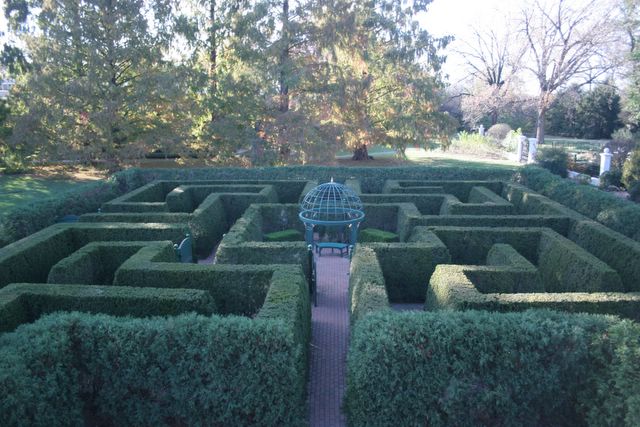
I hadn't been to Shaw's Gardens for decades. Customers at the store kept telling me there are lots of photographers there, but I like to shoot moving targets more than flowers. Well, I'm glad I got out there because there is a lot more to see than just flowers. And the flowers, of course, are amazing. If you'd like to visit the garden it is just North of Vandevender and Kingshighway (in St. Louis, Missouri). For more info you can visit their site at: http://www.mobot.org/
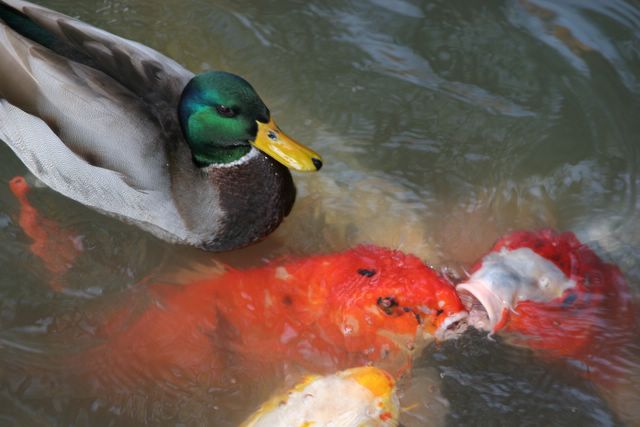
Here are some fun pics for you. Oh, and here is an important tip about visiting the gardens. Take lots of quarters so you can feed the voracious fish in the Japanese Garden. No, you don't feed them quarters, you buy fish food out of a machine with the quarters. :)
geopic
posted by geopic | 8:15 PM
|
0 comments
![]()
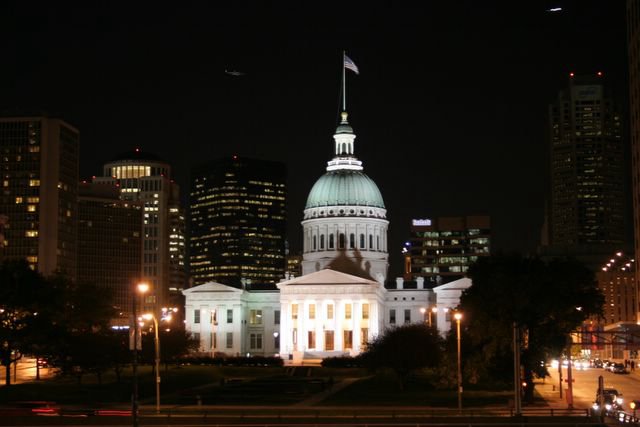
It's been a while since we talked about night photography, and my adventures took me into the city last night so let's do it again.
You may have noticed that I like doing digital panoramics. Currently I'm working on a great project that involves a series of city panoramics. Remember, part of making a great photographic work is being in the right place at the right time. In this case I was going for a cityscape of downtown St. Louis while the Old stadium bites the dust. Or should I say when the old wrecking ball attempted to bite the old stadium. Since the news media didn't release the exact date of the wrecking ball swing early enough to get tickets up in the arch, I invested in several tickets to the top of the arch this week, knowing it would happen some time this week. I didn't do to bad. The ball swung into action at 3:08 pm and my ticket to the top was at 5:20 p.m. November 7th. No, I didn't get the actual swing but I did get up there shortly after the first swing had put it's ding in the skin of the stadium.
Since it is dark in St. Louis by 5:20 pm, I knew I was shooting night shots. So I raced to catch the tram, took my table top ultrapod (a small, sturdy tripod that fits on the arch window sills), wide angle lens, and a lens cloth to clean the baby slobber off the window. I tried to talk the arch staff into letting us open a window but they wouldn't do it. :) darn. Those windows do have hinges on them so it must be for a reason.
Rule number 1 of night photography is to use a tripod. When you take a night shot the shutter stays open a loooong time and the slightest move makes a blurry picture. That is why most people can't get decent night shots. They don't bother to use a tripod. I also used my remote control, to avoid moving the camera while depressing the shutter button. Rule number 2, unless you are shooting something close to you, is do NOT use the flash. Most flashes don't reach very far so if you arm the flash, the camera thinks it will have enough light and doesn't keep the shutter open long enough, so you get a dark shot. For buildings, the landscape (mountain icon) setting works well in most cases.
All the rules we discussed about panoramics still aply: keep the lens at the same focal length as you pan, pan at the same level, and frame your panning to eliminate most of the sky (unless you have great clouds you want to capture). The sky is a bit tricky at night. It's hard to tell where the horizon ends and the sky begins. I happened to know from past experience which buildings tops stick out the highest of all the buildings, so I looked for the top of those buildings and framed them to the top of the images. With an 18mm lens, using the 20D, I can get 4 shots to fill up an almost 180 degree view.
When I got back down to ground level I still only had my table top tripod with me. I didn't want to haul the big one through the Arch metal detectors and onto that tiny egg elevator. Fortunately the ultrapod has a velcro strap on it that allows you to strap the tripod to a post. I took several pictures of the old courthouse using this method. The difficulty was that the wind was blowing hard enough to sway the post. So I just kept shooting until I got a shot between gusts. The Old Courthouse is so brightly lit that I noticed the detail of the building was washed out and over exposed when I used evaluative metering (thanks to digital preview I caught that effect and was able to compensate). The night sky caused the smaller area to be exposed more. This is the same issue you have with evaluative metering in the daytime when a bright sky causes a dark foreground, only backwards. So I switched to spot metering, metered on the entrace to the courthouse, and presto, got a great shot.
I also strapped that little tripod to the hand rails on the arch steps and pointed the camera straight up. That gave me some pretty interesting shots. The Arch is lit up at night giving a cool effect. Have fun in your city, where ever it is.
Finally, I met some real nice people on the arch tram. A cool thing about going up in the arch is that they often mix people who aren't together to fill up the 5 seat cars. I like that because it gives me a chance to meet people, sometimes visitors from out of town. So Happy Birthday Danny, it was great meeting you and I hope you liked your visit to St. Louis!
geopic
posted by geopic | 6:24 PM
|
0 comments
![]()
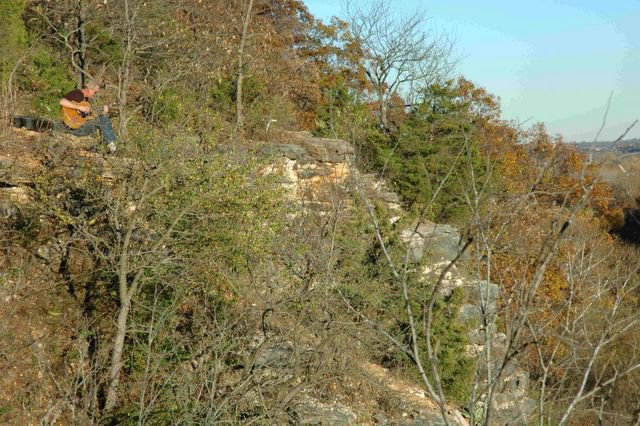
You are at the mercy of nature when seeking fall colors. When Nature cooperates, it's your own fault if you don't get out there. Trees don't take long to go from brilliant to bare so when the colors are great, take advantage of it quickly.
I recently visited Castlewood state park, my favorite place to shoot fall colors. To get to Castlewood from St. Louis, take Manchester Road West from I-270, go 7 miles, turn left on New Ballas Rd (it turns into Big Bend Road), then go right when you see the sign for the park. Once in the park, drive past the visitors center and park at the next parking lot on the right. There is a small shelter there, and the path to the overlook goes up from behind the shelter. Go right on the path. It is a steep hike so bring your monopod or walking stick. The rocks are large enough to make you stumble and fall leaves can be slippery so the walking stick support is highly recommended. The hike isn't very long, maybe a quarter to half mile, but rest along the way if you get winded. The views at the top are spectacular. The picture of the guitarist in my previous post was taken last fall there. Here are some new ones from this fall. Notice how much better the trees look this year. The colors actually stand out the best when the sun is behind a cloud. Sunlight diminishes color with glare. If you shoot in the sun a poloarizer can reduce glare. Use several settings to get the best shots. Landscape setting works well, but experiment with manual and aperature priority also. Remember a higher Fstop like 16 gives you more depth of field.
geopic
posted by geopic | 9:42 AM
|
0 comments
![]()
I've extremely busy and traveling more lately, which has afforded nice photo opportunities.
In Flight Photos - Have you ever noticed that most people on a commercial airliner read or sleep and don't look out the windows. This baffles me because above the clouds, beauty is omnipresent. Take your camera in a small carry-on bag and have it ready to go for those fleeting aerial landscapes. A couple notes about traveling with your camera. First keep it with you at all times. Partially for security reasons but also you can't get the pic if it is in your luggage. To avoid film damage, use an x-ray blocking lead bag, available at camera stores for around $20. If your film goes through the x-ray scanner unprotected, it runs a high risk of damage, despite what the signs say at the airport. Remember, the people working at the airport and the people who make those signs don't see film every day. Camera stores do. I've had numerous customers bring in film damaged by x-ray machines and every one of them said that the airport told them it wouldn't damage it. Expect that your x-ray blocking bag may be hand inspected. To make that fast keep your film out of the containers so they can see it is film without opening each one.
Digital memory cards run a risk going through a scanner, although it is much lower. In most cases memory cards won't be damaged by an x-ray scanner when the card is NOT IN THE Camera. Take your card out of the camera before going through the scanner. I've only had one customer bring in a card that they thought got damaged by an x-ray scanner when it wasn't in the camera. So it is possible, but much less likely. If you want to be extra safe, take some junk pics on your memory card and let it get scanned next time you go on a trip and see if the pics are fine afterwards. Never put your memory cards or film in checked luggage. Luggage scanners are much more powerful than carry on scanners.
A nice feature to make your inflight photos better is image stabilization. Planes move and there is no way around it. Canon calls it image stabilization, Konica Minolta calls it anti-shake, Nikon calls it vibration reduction. All compensate for hand movement to reduce blur. A high shutter speed also helps, when lighting permits. Also bring a rag to wipe the window. It may have nose and finger prints on it.
The most important tip about flying though is picking a good seat. I like to get one in front of the wing, on the side of the plane that I hope will offer the best photo opportunity. How do I know which side is best? I don't always, but I pick based on origin and destination direction. If I'm flying North in the evening I pick one on the West side of the plane to give me a chance at a sunset shot. If I know we will be flying by a cityscape I pick one on the side of the plane I think I'll be able to view the city from. For example, next week I'll be going from St. Louis to Detroit and I hope to get a picture of St. Louis. Since the St. Louis airport is on the North side of town and we are going North East, I'll pick one on the right (South) side of the plane. When I say right it is from a perspective of sitting in your seat facing the front of the plane, not the other way around.
Do you feel self concious pulling that camera out and taking pics while everyone else is in boredom land? Well get past that. The rewards of overcoming you social stigmas far outweigh what someone you will never see again thinks. Of course you do have to adhere to airline rules concerning carry-ons.
Photographing People -
Funny thing about people. Lots of people who are the shyest about having their picture taken, shun photographers, and never take a camera anyplace, are the same people who beg you for photos when they see how nice the ones you took are. So don't let them discourage you, they like photographs to, they just aren't into making them. If you want people shots ask the person first if they mind if you take their picture, and if they don't want their picture taken don't do it. They will probably regret it later, but respect their wishes. Some religions are adamant against photographs being taken of them. If you want a candid shot (always look better than posed), and don't want to ask the person, take the shot, ask the person after the fact, and delete it if they protest. Keep model releases with you just in case that picture is nice enough to sell. Again, don't be afraid to approach people. I've found 99% of people I ask approve and appreciate getting a copy later. Especially when you capture them in their element, doing what they enjoy doing most with whomever they enjoy being with.
An exception to the asking rule is if you take a picture in which the subject is not recognizable. You don't have to ask a crowd of people for permission to take their picture either. A photograph of a crowd, without an individual who stands out as the main subject, does not require a model release. Have you ever noticed that contest winning photos almost never show the face of a main subject? That's because main subject models require a model release and if the photographer didn't get one from the person they can't use the picture.
A few general tips about photographing people. Close is usually better than distant. All that junk surrounding people may seem interesting at the time, but what transcends generations is the faces. There are times when you want to capture the surroundings, for example a mountain climber is more interesting when you can see how high up they are. A wide angle lens can give you both with the subject in the foreground. As for settings, it is dependent upon the lighting, but if your camera has a portrait setting those work great in most cases. A somewhat shallow depth of field will blur the background and make the person stand out more. When using a flash, beware of back shadows. Back shadows are an ugly distraction in a portrait. To avoid them use multiple light sources and aim one at the back wall.
geopic
posted by geopic | 8:33 AM
|
0 comments
![]()